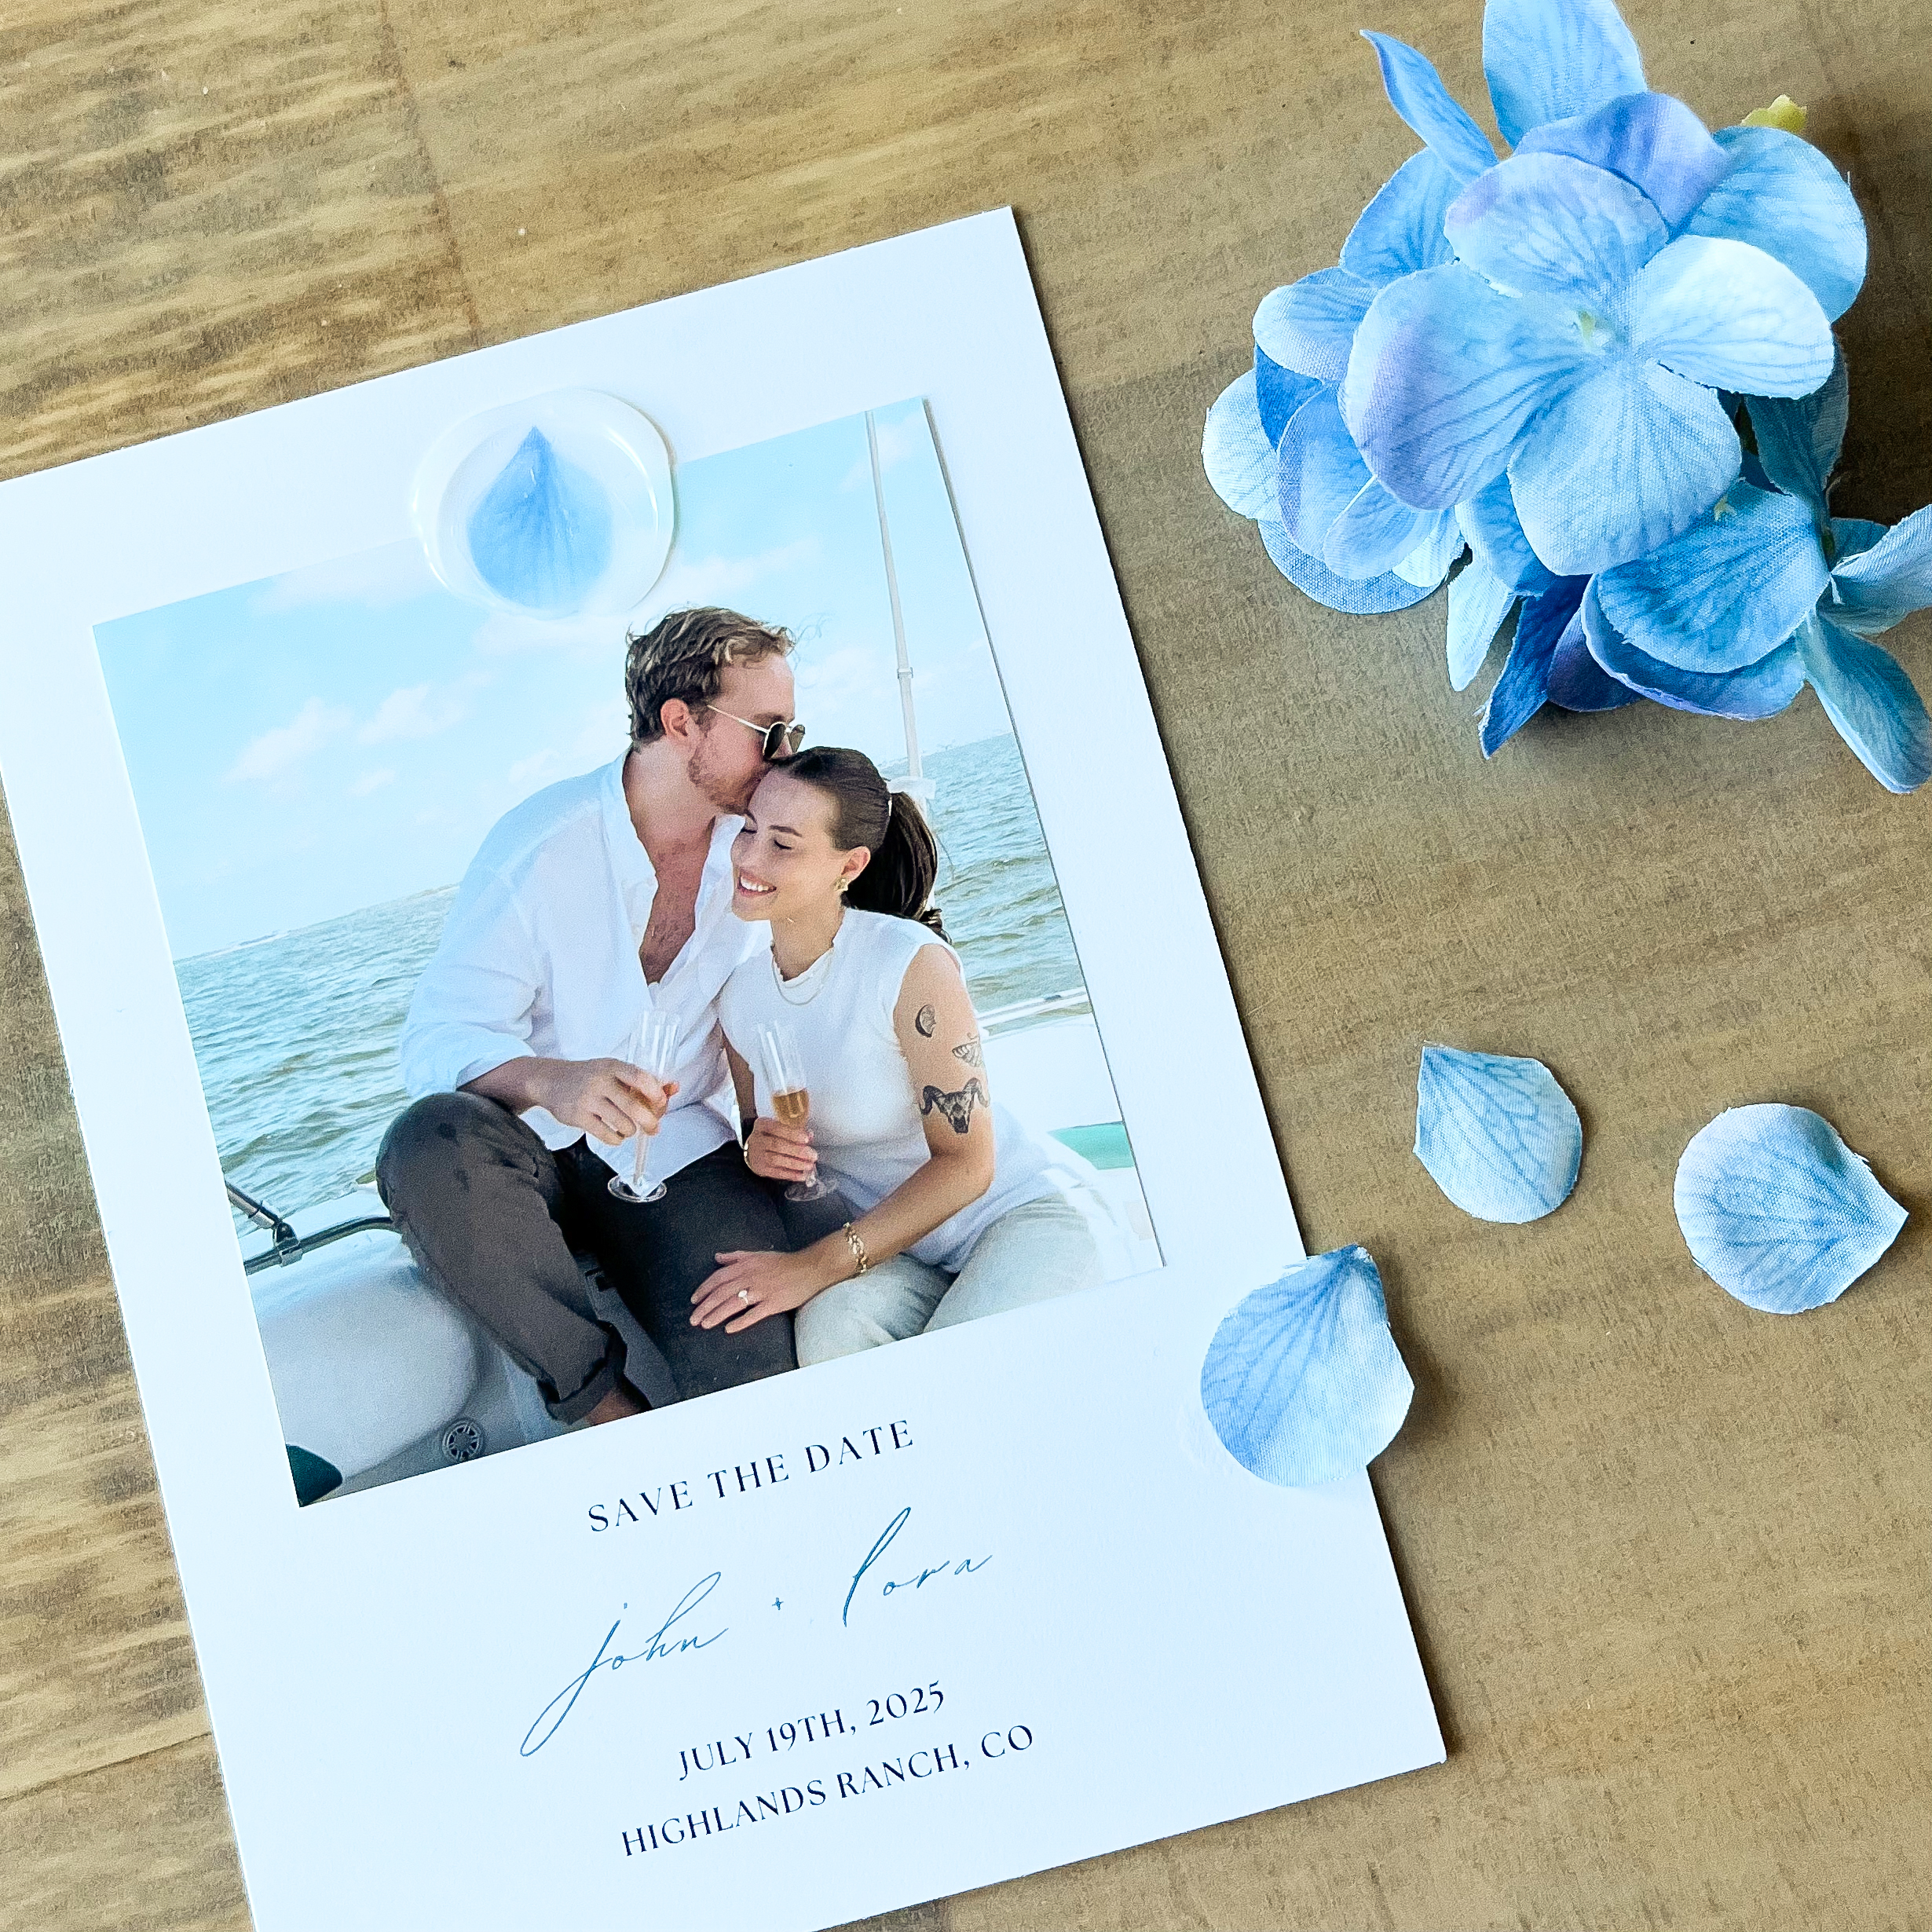
The following post details how I personalized our Save The Dates, and hopefully leaves you feeling inspired with some Save The Date ideas.
Planning a wedding involves countless details, but one of the most personal touches is how you announce the big day. As a naturally “Type A” individual, I felt a significant amount of pressure to get our Save The Dates just right. For me, these cards were more than just an invitation—they were a glimpse into the vibe of our entire wedding.
After exploring various pre-made options, I decided to take matters into my own hands with Canva, crafting custom Save The Dates that perfectly reflected our style.
In this blog post, I’ll walk you through the creative process behind our Save The Dates, from designing and printing to incorporating special touches like personalized wax seals and stylish envelopes.


Designing our template in Canva
I am naturally a very “Type A” person, so I had a very difficult time picking a style and template for our save the dates. It felt like more than a piece of mail our family and friends would receive, it felt like an introduction of the vibe of the rest of our wedding (which, naturally, I wanted to be perfect too).
That being said, after trying out several pre-made stationary websites like Zola, Minted, and Truly Engaging, I opted to use a Pro plan on Canva to create my ideal Save The Dates from scratch!
Using Canva was incredibly easy, fun, and budget-friendly! I spent a few hours crafting my perfect blank stationary and then used Staples to print them for cheap. They were ready within about a week.
On the front, I left 2/3 of the page blank for the photos of us to be attached, and added our names, wedding date, and location at the bottom of the page. I decided to make our names dusty blue, which will be one of our wedding colors.
I opted to print on the regular-grade paper, and it turned out beautiful. The quality was great and perfect for our Save The Dates.


Printing our engagement photos
For our engagement photos, we wanted to aim for classy, coastal, laid-back vibes that would appear casual but also timeless. I spent a lot of time pinning Save The Date ideas and engagement photos on Pinterest that matched this style. I also knew I wanted the photos taken on a digital camera so they would have a more stylized appearance.
Our photos were taken by my younger sister, on a Canon Powershot SX530 HS that I bought second hand for around $100. It was perfect and the photos turned out so much more beautiful than I could have hoped for.
I edited the raw photos in Lightroom using presets that I created to help brighten up all the colors and help the blues really match our wedding color.
We printed our photos in a square shape using Shutterfly which was also extremely cheap and easy to use! We decided on a glossy finish for a classic photo appearance.
Personalizing with our wedding flower
Our wedding will be centered around lots and lots of blue and white hydrangeas. I selected a blue hydrangea petal to use in the wax seal to tie in the theme (it was also lucky that it happened to match our coastal engagement photos perfectly).
We tested out fake flowers and real flowers, to see which would hold up best to the hot wax, and found that fake flowers (as long as they are the cloth-based petals and not the more plastic ones) work best. I recommend picking out flowers that are higher-quality as they will look much more realistic when encapsulated in the wax.
Other Save The Date ideas could include using greenery instead of a petal, a seashell, a button or other small memento, or a miniature photo!


Adding a custom wax seal
For the wax seal, I decided to go with a vellum-colored wax that was a mix between opaque and transparent. It allowed the petals to be seen, while also blurring them and giving a more romantic and artistic effect to the Save The Date.
Our wax stamp was a blank circle, to make sure the focus was on the hydrangea petal and there was no other design obscuring it.
Selecting chic envelopes
Our envelopes we selected are a basic, dusty blue, that we got from Amazon. We chose these to tie-in with the color of the hydrangeas and our wedding color of dusty blue.
These envelopes came with sticky adhesive strips that could be peeled off, instead of having to individually lick each envelope. This made it way easier and quicker to assemble our Save The Dates.


Finishing touches with an embosser
We purchased an embosser to use on the envelopes for a bit of an extra touch of elegance and personalization. To keep it simple and improve the chances that we would be able to reuse our embosser, we chose a very simple monogram design with our first name initials.
Click below for a direct link to the embosser we purchased on Etsy:
Etsy Store Name: SubtleandWild
tips & tricks


- Use an ice pack to keep the wax stamper cold between presses into the wax seals. This will help each seal solidify way faster, making the entire process a breeze.
- Keep your hot glue gun on a low heat setting when doing the wax seals. This will prevent the wax from getting too runny which makes it very difficult to work with.
- Consider purchasing multiple wax stampers to streamline the process and cut the time spent in half.
- Buy more than you need! Extra wax, extra photos, extra cards, and definitely extra envelopes if you are hand-addressing like we are.

